Your slogan here
Learn How to Make Dog Bows
The basics to learn how to make dog bows are simple. However, like anything else you are learning to do for the first time, it may take a few practice tries to get them to come out perfectly.
The thing to remember is that your dog most likely will not be as picky as you are about how they look. As long as you express delight, and the dog hair bows do not irritate your dog's fur or head, you are on the right track.
That said, here is some general information about making your own dog bows:
They do not require much material, often under 12 inches or 300 mm in length and less than 1 inch or 25 mm wide. This means you can use small lengths of prefabricated ribbon, or else use fabric remnants to create your own ribbon.
Generating your own ribbon is especially useful if you have made your dog an outfit and want to create bows to match - see link at bottom
Stiffer ribbon may be easier for you to work with than ribbon that is slippery, but pins or rubber bands can be used to hold things in place until you can sew or glue them.
Ribbon ends that are cut at an angle generally look better than those cut straight across.
As you learn how to make dog bows with the following designs, experiment with different lengths, widths and designs of fabrics or ribbons.
Before you sew or glue the bow parts in place, take a critical look to see how well the product matches your dog's size and fur color and make any necessary adjustments - just be careful not to poke your dog with the pins!
There are several ways you can learn how to make dog bows. I call one type of dog bow the "ruffled flat bow" design:
Simply take a 12-inch piece of ribbon and fold it in half.
Place two pins side-by-side through this midpoint.
Take the left end of ribbon, fold it about an inch (25 mm) out from the pins, then loop it back to pin it with the left pin - you will need to remove and replace this pin.
Should you loved this post and you would like to obtain more details relating to Party Hats for Dogs i implore you to visit the web site.
Now do the next two or three layers the same way, but fold each a little closer in. Note that you can do this by folding underneath or on top of the original length of ribbon - just be consistent with the way you started.
Once you have finished with the left side, you can do the right the same way - try to get the layers as close together as possible in the center.
Then it's just a matter of sewing or pasting the layers together, and covering up the middle part with a decorative button, a contrasting or similar colored piece of ribbon, or a prefabricated rose or flower. (I find hand sewing the layers, then gluing on the decoration to be the easiest way).
You can also learn how to make dog bows that look like bow ties:
These require shorter lengths of material, about 4-6 inches (100-150 mm).
Start by folding the loose ends of ribbon under at each end so that they overlap in the middle.
Put a pin through them to hold them in place.
Next glue or sew those ends to the top layer, then wrap thread around the middle and pull tight.
This middle section can then be covered up with attractive decorations or fabric as per the ruffled flat bow.
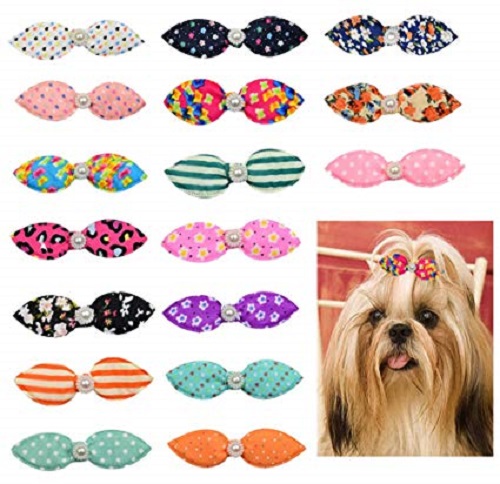
Note that the wider the piece of ribbon and the narrower the middle, the more pronounced the bow tie effect will be.
To fasten these bows to your dog's head, there are a couple of ways that may work:
One is to sew latex bands or a child's hair holder to the bottom sides of either of the above types of dog hair bows, then use that to attach your designs to the fur.
Another is to glue the items you have made onto metal or plastic barrettes
You may be able to buy plain barrettes at a drugstore or online. Or else look through your local dollar or 99 cents store and see if they have plain or ready-made barrettes for a lower price. (You can always remove the fabric that is on them if you want to change the look.)
As you can see, you too can learn how to make dog bows. They're relatively easy, fun and inexpensive ways to dress up your doggie. Besides, as any crafter knows, the thrill of having made something yourself usually remains with you much longer than the feeling you get when you have bought a comparable product.